Eclipse
If you don't live at the bottom of a cave, you probably know that between 2026 and 2028 there is going to be a "trilogy" of consecutive solar eclipses highly accessible from Spain, something that hasn't happened for over a century. For yours truly, this will be the first opportunity to witness such a spectacle and, of course, to photograph it.
However, it’s not as simple as pointing your camera at the sun and clicking the shutter. It requires specific gadgets, as well as meticulous planning and technique to make the most of it. That is the purpose of this post: to share some tips and resources that I have been gathering over the last few weeks. My main source of information has been Antoni Cladera, one of the founders of PhotoPills, who gave a masterclass on June 24th at La Ampliadora de Fotonistas, a lecture series created by the tireless Ana Arbonés, which I cannot recommend highly enough. From that talk, I jotted down a ton of ideas and advice, which have complemented information I’ve gathered from other experts like Jesús García Flores, and which I summarize here hoping you find it useful so you don't miss out on a once-in-a-lifetime opportunity.
When and where
Naturally, the first step is knowing the dates of the eclipses and the best locations. Mark these key dates:
August 12, 2026, around 20:30 - Total solar eclipse visible across the northern half of Spain.
August 2, 2027, around 10:45 - Total solar eclipse visible in the southernmost tip of Spain, Cádiz area.
January 26, 2028, around 18:00 - Annular solar eclipse visible in the southeastern area of the peninsula.
There are plenty of reliable sources to find more specific details. For instance, the Instituto Geográfico Nacional (available in all national languages and English).
When planning which spot on the peninsula is the most appropriate, it is important to consider a few factors:
Ease of access.
Crowds - Guides on the "hot spots" are already being published... and we all know what that means. In my humble opinion, it might be more rewarding to find a less iconic but quieter spot so you don't have to suffer through a sea of tripods.
Scenic interest - If your goal is to photograph only the phenomenon, it doesn't really matter. But if you want that epic shot of the eclipse behind a monument (more info here), you need to research beforehand where to shoot from.
Sunset time - On the Mediterranean coast, it won't be possible to see the end of the eclipse because it will occur with the sun already below the horizon. Mind you, that’s not a bad thing; it will be an unforgettable sunset, but if your goal is to document the entire transit, you have to keep it in mind.
What exactly are we going to see?
Again, there are thousands of websites explaining everything there is to know about a solar eclipse. But obviously, I’ve already put together my own summary table condensing the essentials. In a total eclipse, there are four contact moments between the two celestial bodies that define three distinct phases:
| Contact Moment | Phase | Duration (Aug 12, 2026 - Burgos) |
|---|---|---|
| C1 - The moon "touches" the edge of the sun. The bodies look like two intersecting circles. | Ingress partiality begins. | Approx. 55 min. |
| C2 - The moon completely obscures the sun. | Totality begins. | 1 min and 44 s |
| C3 - The sun begins to appear from the other side. | Totality ends and egress partiality begins. | Approx. 50 min. or until sunset |
| C4 - The moon "touches" the sun one last time before separating definitively. | End of the eclipse. | — |
Keep an eye on how short totality is! In the table, I used the durations in the city of Burgos as an example—one of the provincial capitals where it will last the longest—but in many other places, it won't even reach a single minute. So let's go prepared and well-rehearsed so we don't miss a thing.
During the two partial phases, we will see how the moon slowly "eats away" at the sun. But just at the end of C1 and at the beginning of C3, there are two phenomena with their own names that drive astronomy enthusiasts wild: "Baily's Beads" and the "Diamond Ring”. They last a heartbeat, barely two or three seconds, but later on, I’ll share some tips made in Toni to be able to photograph them.
Baily's beads, named in honor of the British astronomer Francis Baily who first described them in 1836, are point-like flashes produced because the lunar surface is irregular, full of mountains and craters. As for the ring, it’s a somewhat grand name for what is, in reality, the very last flash before totality.
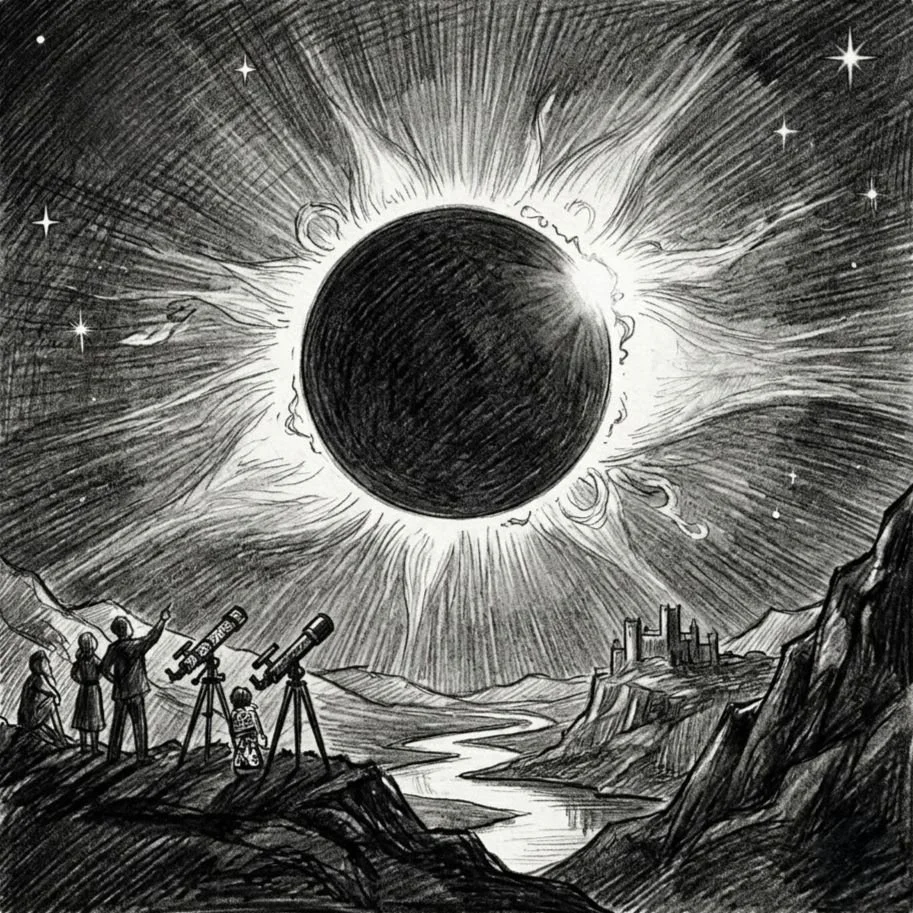
And, during totality, we will be able to see the solar corona and the chromosphere. These are two parts of the sun that only become visible to mere mortals (meaning those of us without specialized astronomy equipment) during eclipses. The chromosphere is a red line surrounding the circumference of the moon from which solar prominences—gigantic hydrogen flares—shoot out. The corona is the halo of bluish light with filaments blasting in all directions millions of kilometers away.
Meanwhile on Earth, silence will fall, the temperature can drop between 5 and 10 degrees, a breeze will appear out of nowhere, and along the horizon, we will see sunset colors due to the "daytime night" effect of the eclipse. I get goosebumps just thinking about it.
Essential equipment
Solar eclipse glasses. During the partial phases, it is OF THE UPMOST IMPORTANCE to protect your eyes properly if you don't want to burn your retina irreversibly. They are very cheap and available everywhere. At the end of the article, I’ve included a list of trusted stores.
Tripod. Mandatory. It is, quite literally, impossible to photograph an eclipse handheld.
Remote shutter release. It is essential to avoid blurring your photos with your own hand when pressing the shutter. If it's an intervalometer so you can program the shot frequency, even better. Cabled ones are cheap and reliable.
Telephoto lens. This is a matter of taste... some might prefer a wide-angle or standard lens to contextualize the phenomenon, but I definitely want the sun to be the protagonist, so I'll be bringing my 100-400mm (equivalent to a 200-800mm on Full Frame), although I probably won't use it at maximum focal length.
Solar filter for the lens. There is only one choice: Baader Astrosolar OD5.1 or 5.0 sheets. Even though they look like tinfoil for wrapping sandwiches, they are the element that ensures you won't burn your sensor or your shutter curtain. They are sold as mounted filters (expensive) and as loose sheets to make your own custom filter (cheap). OD3.8 sheets are not suitable because they let through too much radiation.
Drinks and snacks. 😎😉
Photography techniques for the eclipse
As I mentioned before, the camera will absolutely be on a tripod and we will shoot using an intervalometer. Now let's look at the basic parameters. Crucial question: how do we focus on the sun? Since digital cameras focus by contrast, the best approach is to put the solar filter on and focus on the edge, the so-called solar limbo. There is a sharp line there that will leave your focus perfectly locked; once set, switch the lens to manual focus (MF) and leave it untouched.
By the way, everything must be done via the LCD screen, never through the viewfinder if you are using a DSLR camera. Looking through an optical viewfinder is like looking directly at the sun, and we’ve already established that can only be done with protective glasses and for very brief moments. The LCD screen offers all the information you need and is completely safe without glasses. The electronic viewfinder (EVF) on mirrorless cameras is safe, but tremendously uncomfortable to use given the angle.
Keep the aperture at its sweet spot, f/8, f/11... while the shutter speed depends entirely on the phase. The ISO will simply be whatever the camera requires.
The white balance is also a matter of taste. I confess I usually leave it on automatic out of pure laziness, since it can be changed with a click in post-production, but I know I shouldn't. The correct temperature should be around 7000K to properly capture the sun’s rich reds and yellows.
Partial phase(s)
During both ingress and egress partiality, we will have the Baader filter in position, our eclipse glasses on if we want to look directly at the sky, and off if we are looking through the LCD screen, shooting as we please. In the August eclipse, ingress partiality lasts nearly an hour, so we can take it easy. I’ll be taking a picture every five or ten minutes.
Check every now and then where the sun is in your frame—remember celestial bodies move quite fast. Unless you have an equatorial mount, you’ll have to manually move the tripod to recenter our protagonist.
Rush hour: final ingress partiality, totality, and egress partiality kickoff
This is where you need to be thoroughly prepared because everything happens in the blink of an eye. Burst mode will be our best friend, but since lighting conditions change so rapidly, we will need to set up a bracketing sequence so the camera adjusts the shutter speed automatically.
I have to thank Antoni and Ana once again for the Fotonistas masterclass. Without them, I would have been completely unable to figure out these tips.
About 20 seconds before totality, you need to remove the Baader filter and configure your camera to shoot an exposure bracketing of 9 shots with 1-stop increments (or 7 shots with 1.3-stop increments), based on a center shutter speed of 1/500s. This way, the camera will fire a burst ranging from 1/8000s down to 1/30s, capturing all the details of the moon, Baily's beads, and the diamond ring.
As soon as the moon covers the sun completely and we enter totality, the light will plummet. Remember to bump up your ISO if you feel it's necessary, but the fundamental step is changing the bracketing baseline speed to 1/15s. Thus, the camera will shoot 9 frames in each burst between a maximum speed of 1/250s and a full 1s exposure. With this, you should be able to capture the brightest, innermost filaments of the corona. Furthermore, automating the shutter speeds will allow us to take our eyes off the screen and enjoy the show with our own eyes.
Ten seconds before the darkness ends, you only need to return the baseline speed to 1/500s to repeat the process in reverse. We catch the second diamond ring and the final beads, quickly pop the filter back on the lens, and all that's left is to enjoy the rest of the eclipse.
Useful resources
At this point, you might be thinking you need to buy a physical stopwatch to track all the times mentioned above. Far from it 😊. Toni also gave us an invaluable tip in the form of an app: Solar Eclipse Timer is an audio announcer that will automatically call out notifications in English at each key moment. The app itself is free, and each data package for an individual eclipse costs $2. Once the data is downloaded, it works perfectly without cell coverage and is very straightforward to use (even if the voiceover is a tad unnerving, at least in Spanish).
The second app is a classic: PhotoPills is probably the best photo planner out there. It costs around €14 and is a foundational tool to scout the best locations by date. Yes, you have to learn how to use it, but once you get the hang of it, it is a lifesaver.
Lastly, a list of stores where you can buy filters and glasses:
Còsmik (Barcelona)
Valkanik (Terrassa)
Telescopiomanía (Girona)
Astroshop (Madrid)
Foto Roma (Madrid)
Astrocity (Madrid)
Espacio Celeste (Granada)
González Fotografía y Astronomía (Valencia)
Clear skies and enjoy the eclipses!
Note: This post contains no affiliate links.