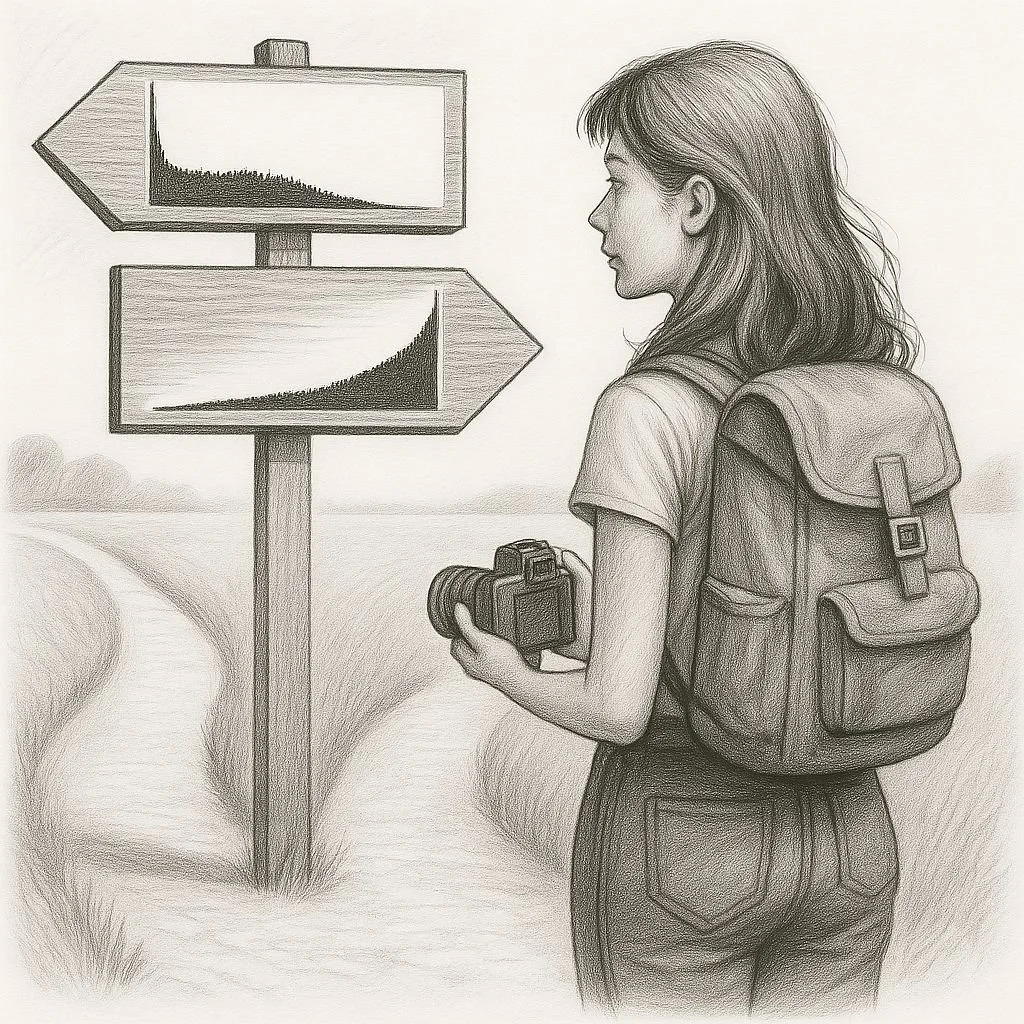
Right-wing or left-wing?
I’ve been hearing photographers argue for quite some time about two “trends” in digital exposure: on the one hand, those who say the correct thing is to push the histogram to the right whenever possible, and on the other, those who prefer to underexpose. Everyone has their reasons, and I couldn’t quite tell which option was the right one—if such a thing even exists.
So I set out to research the topic to find answers and I’ve gathered the essentials in this article. I’ll start with a simple explanation of how a digital sensor works, then discuss the two techniques, and finish with a practical example.
How a digital sensor works
Let’s set film aside: this applies only to digital cameras, whose photosensitive component is a sensor—an electronic system that’s fairly complex but can be (greatly) simplified as follows:
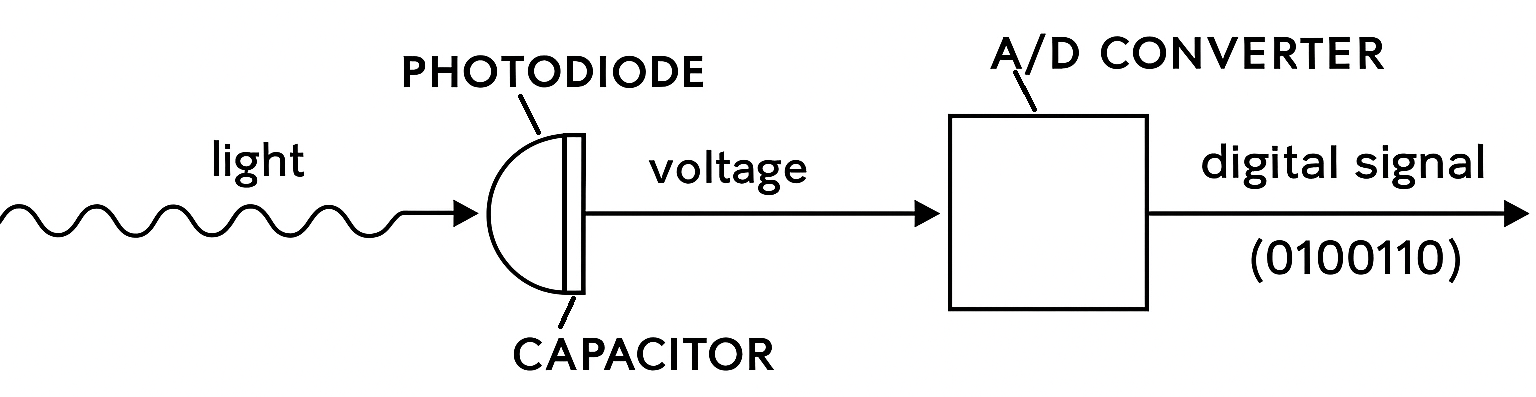
Light (electromagnetic radiation) is collected by a photodiode and converted into electrical charge or voltage, which is then processed by an analog-to-digital converter to turn it into a binary signal (a series of ones and zeros).
For our purposes we’ll ignore color management, because it complicates the explanation with additional components we don’t need here, such as the Bayer filter. Nor will we go into the details of different sensor technologies. The idea is to simplify the process as much as possible. So we’ll imagine that our camera were black and white and that the sensor performs these two steps: from light to voltage and from voltage to digital signal.
As I said in the previous paragraph, the specific way these electronic components are arranged differs depending on the sensor technology (CCD, CMOS, etc.), but what matters here is that, in the end, it’s a matrix of X rows by Y columns of little squares called pixels, each of which captures light from a point in the scene. In essence, the more light reaches a pixel, the more electrical charge it accumulates and the higher the resulting binary number..
Key concept 1: dynamic range and digital noise
Depending on several factors such as its technical design and photodiode size, the sensor will have more or less dynamic range. This is a very important concept: it refers to the span of light intensity the sensor can capture without saturating. The greater the range, the larger the difference between dark and bright areas it can record. The sensors in the earliest digital cameras (back in the 2000s) had less dynamic range than today’s models and also handled noise more poorly.
What is noise? Random fluctuations that add to the signal and “dirty” it. It’s inevitable: the very arrival of photons is variable (shot noise); additional fluctuations appear in the readout and digitization process (read noise); and, moreover, electrons are generated thermally even in the absence of light (dark current), whose contribution grows with temperature and exposure time.
One measure of a digital sensor’s quality is the signal-to-noise ratio (SNR). The higher, the better. Noise tends to be more noticeable in the darker areas of an image precisely because, there, the light signal is low and SNR drops. In the image, noise shows up as pixels with colors that don’t belong (chroma noise) and as luminance grain. And no, it’s nothing like film grain—if only.
Who doesn’t like an exponential function…
A sensor’s dynamic range, or DR, is measured in stops of light. Why? Why not. It seems more appropriate than measuring it in liters or m/s. In general, a modern sensor has about 12 or 14 stops of DR, versus the 20 our eyes can reach by adjusting the pupil. In other words, it can’t process as much light as the human visual system. The key point about stops is that going up one stop doubles the amount of light and going down one stop halves it. Why? Because an exponential function is much cooler than a linear one, hands down. Seriously though, it follows the same logic as apertures, where adding or subtracting a stop doubles or halves the light entering the camera.
Recapping so far: the sensor records the scene’s luminance up to the limits of its dynamic range. Above its brightness threshold it will saturate, showing pixels as completely white little squares, and it will inevitably record some amount of noise.
Key concept 2: bit depth
Once we understand how a sensor captures luminance, we still need to explain how that becomes digital information. In the diagram above, after turning light into an electrical signal, there’s another component called the A/D converter. It’s responsible for translating the analog (electrical) signal into a digital signal (ones and zeros).
Here comes the second key factor: bit depth—that is, the length of that series of ones and zeros. The longer the series, the more distinct values it can encode. In everyday life we use base-10 numbers, meaning we have ten digits that we combine to get any number. The value of a digit changes depending on its position in the string: having €5 isn’t the same as €50, €500, or €5,000, right? In computing we work in base 2, so there are only two digits (0 and 1) whose value also depends on position.
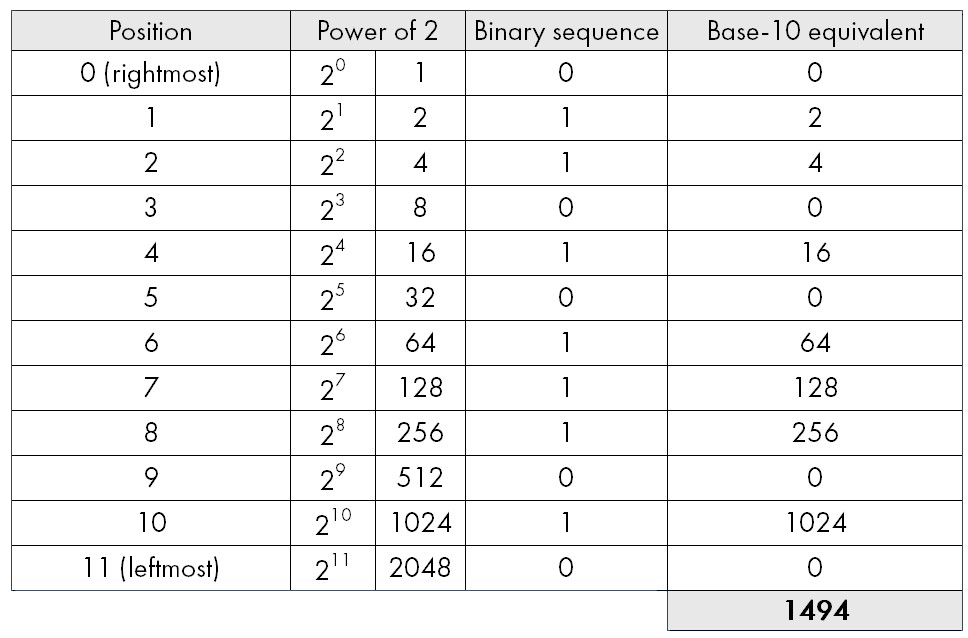
A current digital camera has 12-bit depth or more. In other words, the binary strings into which the A/D converter translates the electrical signals look like 010111010110. And what is that number in plain decimal? 1,494, of course (hehe). To do the calculation, remember that each position in the string, starting from the right, represents 2 raised to the power of its position. If there’s a 1 at that position, it counts; if there’s a 0, it doesn’t. In the end we add up all the values for the positions where there was a 1.
Life is better with Excel!
So, with 12-bit depth, the highest value that can be represented is 4,095. If the camera had 14-bit depth, we could represent up to 16,383. If it had only 6 bits of depth, the highest value would be 63.
Why does this matter? A lot, because the more values there are, the more tonal gradation there will be between the lowest value (black) and the highest (white). In other words: bit depth gives us the number of “steps” the sensor can encode between its black and white thresholds, which in turn depend on dynamic range—that is, on the span of light it can record without saturating.
This is easiest to grasp with a little sketch:
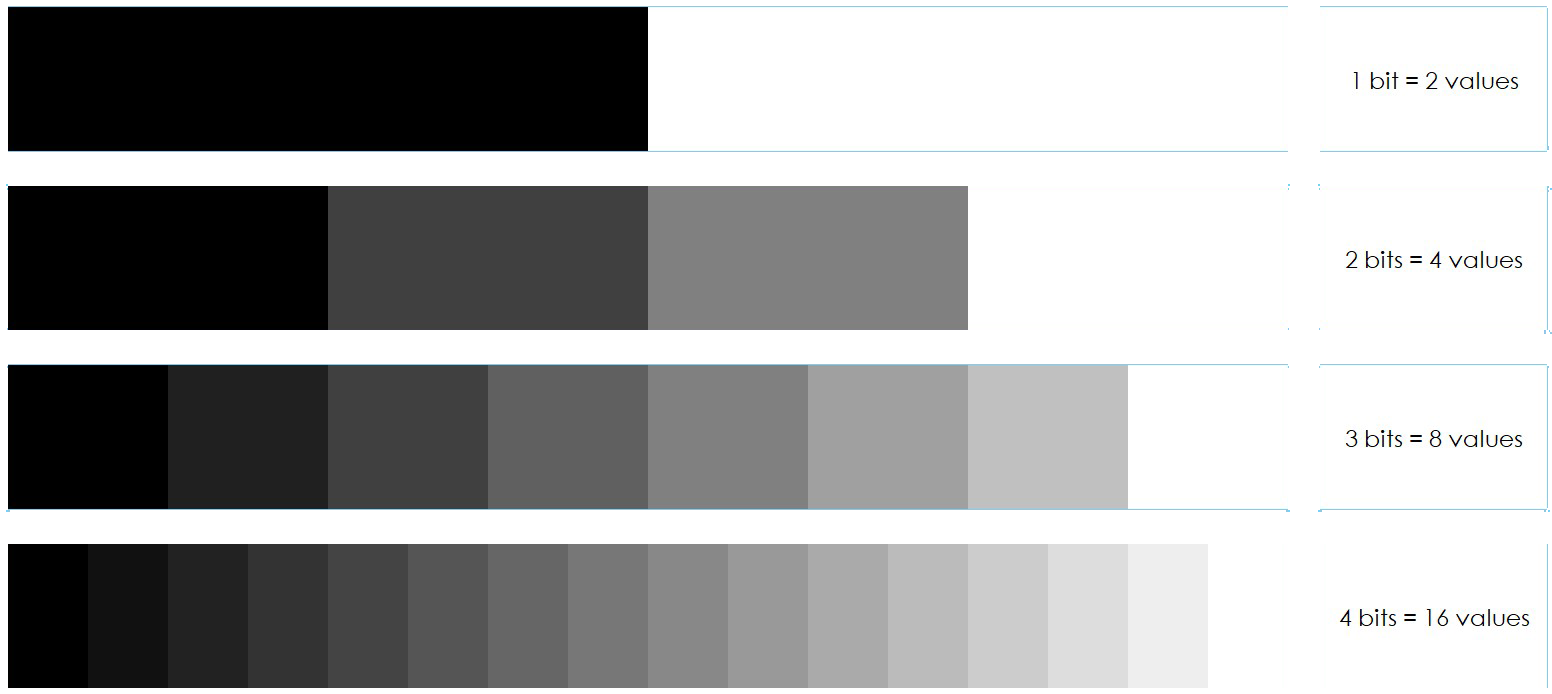
With 1-bit depth we can represent only two “steps” or shades of gray: black and white. With 2 bits we can represent 4 tones; with 3 bits, 8; with 4 bits, 16; and so on. Because the scale is exponential (powers of 2), each extra bit doubles the number of tones. That’s why with 12 bits we reach 4,096 tones in total, from 0 (black) to 4,095 (white). The correspondence between the real luminance of the photographed scene and its digital representation will be quite good, because there are many “steps” available to assign to each light level.
How dynamic range and bit depth relate
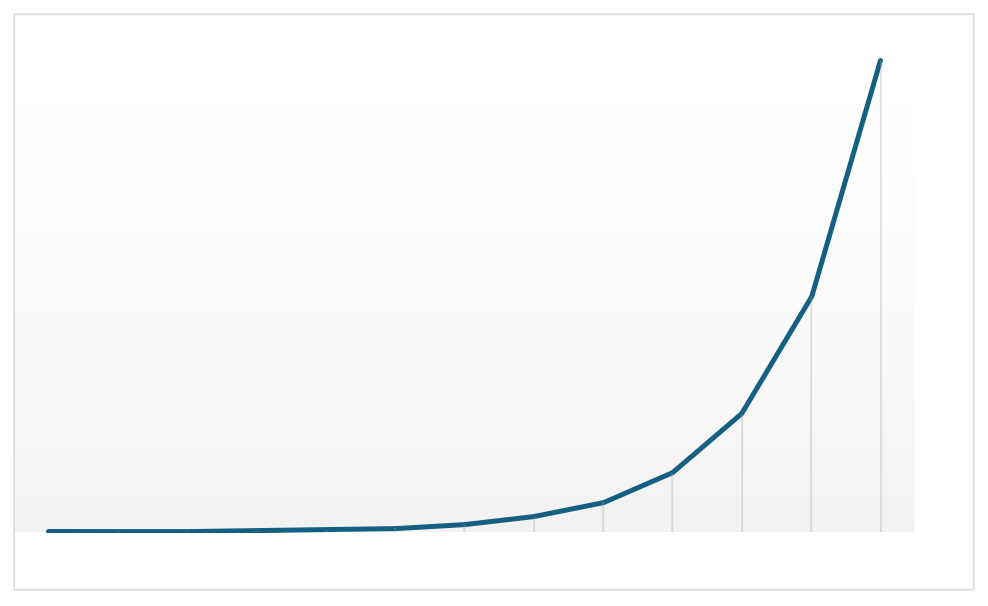
Now that we’ve covered the two key aspects of the sensor, we still need to understand how they relate—and this is essential for explaining ETTR. As mentioned earlier, each DR “block” represents double or half the light of the adjacent one, but the 4,096 gray values form a linear gradation from 0 (black) to 4,095 (white). So then?
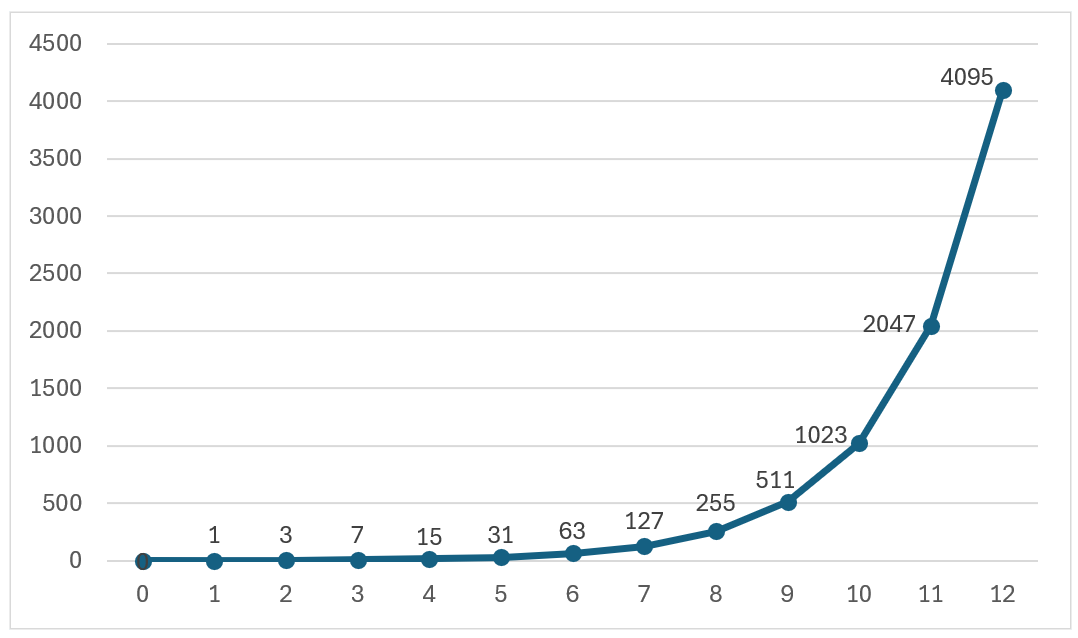
If we look at the previous graph, those 4,096 values on the vertical axis have to be distributed according to the exponential function defined by dynamic range on the horizontal axis. Stop 12, which corresponds to the brightest range, therefore accumulates half of the luminance values, and as we move left toward black, at each stop the remaining values are halved. By the time we reach stop 1, the darkest, we’re left with only one value, poor thing.
I’ve heard some photographers say, “my sensor doesn’t do that.” Well, yes it does. All general-purpose digital cameras on the market today—whatever the price range—share these operating principles. The differences come down to sensor size, resolution, dynamic range, bit depth, and, of course, the quality of the components that process the signal. But essentially, the logic is the same.
Expose to the right, or ETTR
All this long preamble was necessary to get here: why many photographers recommend increasing exposure in a digital camera as far to the right as possible without saturating the sensor. This detail is essential to avoid blowing highlights—in other words, having pixels that are completely white, with no information or texture.
The logic is that by exposing this way we make the most of the sensor’s tonal capacity, since much more digital information is encoded in the highlights than in the shadows. With this approach we improve SNR—which is to say we reduce noise—and overexposure in camera is recoverable in post-production, as long as we haven’t blown the highlights, I must insist.
One of the earliest articles published on the subject, which popularized the technique, was Michael Reichmann’s in 2003.
In practice, how do you “expose to the right,” or ETTR? Everyone will have their own method; mine is to use spot metering, identify the brightest area in the frame, and meter off that point. I know my camera’s dynamic range lets me overexpose that spot by up to two stops (you’ll need to test this with your own gear), so based on the meter reading I adjust either aperture or shutter speed to make sure the highlights don’t clip. Since I use a mirrorless camera, I can see both the values and the histogram in the EVF. If you’re shooting a DSLR, you’ll need to check the rear screen—unless your eye is so well trained you don’t need that aid, of course.
Note: although the camera’s histogram is considerably more reliable than judging by the on-screen photo, it isn’t totally exact either, because it’s based on the JPG preview, not on the RAW data. Therefore it may warn of clipping or blowout in the highlights when, in reality, there’s still headroom. That’s because the JPG always has less tonal range than the RAW.
That said, this technique is neither an exact science nor mandatory nor guaranteed. In other words, the risk of blown highlights exists and is hard to fix. On the other hand, deliberately overexposing in-camera forces you to shoot RAW and process afterwards. If not, it makes no sense to expose to the right.
Underexposing by default, or ETTL
ETTR has been the mantra during the first two decades of digital photography. But recently some photographers argue that, with sensor improvements, noise has decreased noticeably, while a blown highlight is still unrecoverable. To avoid the risk of misjudging and overexposing, they find it more practical to underexpose—Expose To The Left—to protect highlights and then recover shadows in post-production. And if noise appears, there are excellent denoise algorithms to remove it. Strictly speaking, ETTL isn’t a technique like ETTR so much as a relatively recent habit among some photographers, especially in landscape.
Deliberately underexposing doesn’t provide a signal-to-noise advantage the way ETTR does. It is more a pragmatic choice some photographers make to work from shadows or protect highlights—especially when they must shoot quickly or the light is changing rapidly—knowing that, despite the underexposure, they are still capturing enough information in the shadows to lift safely in post-production.
A practical example
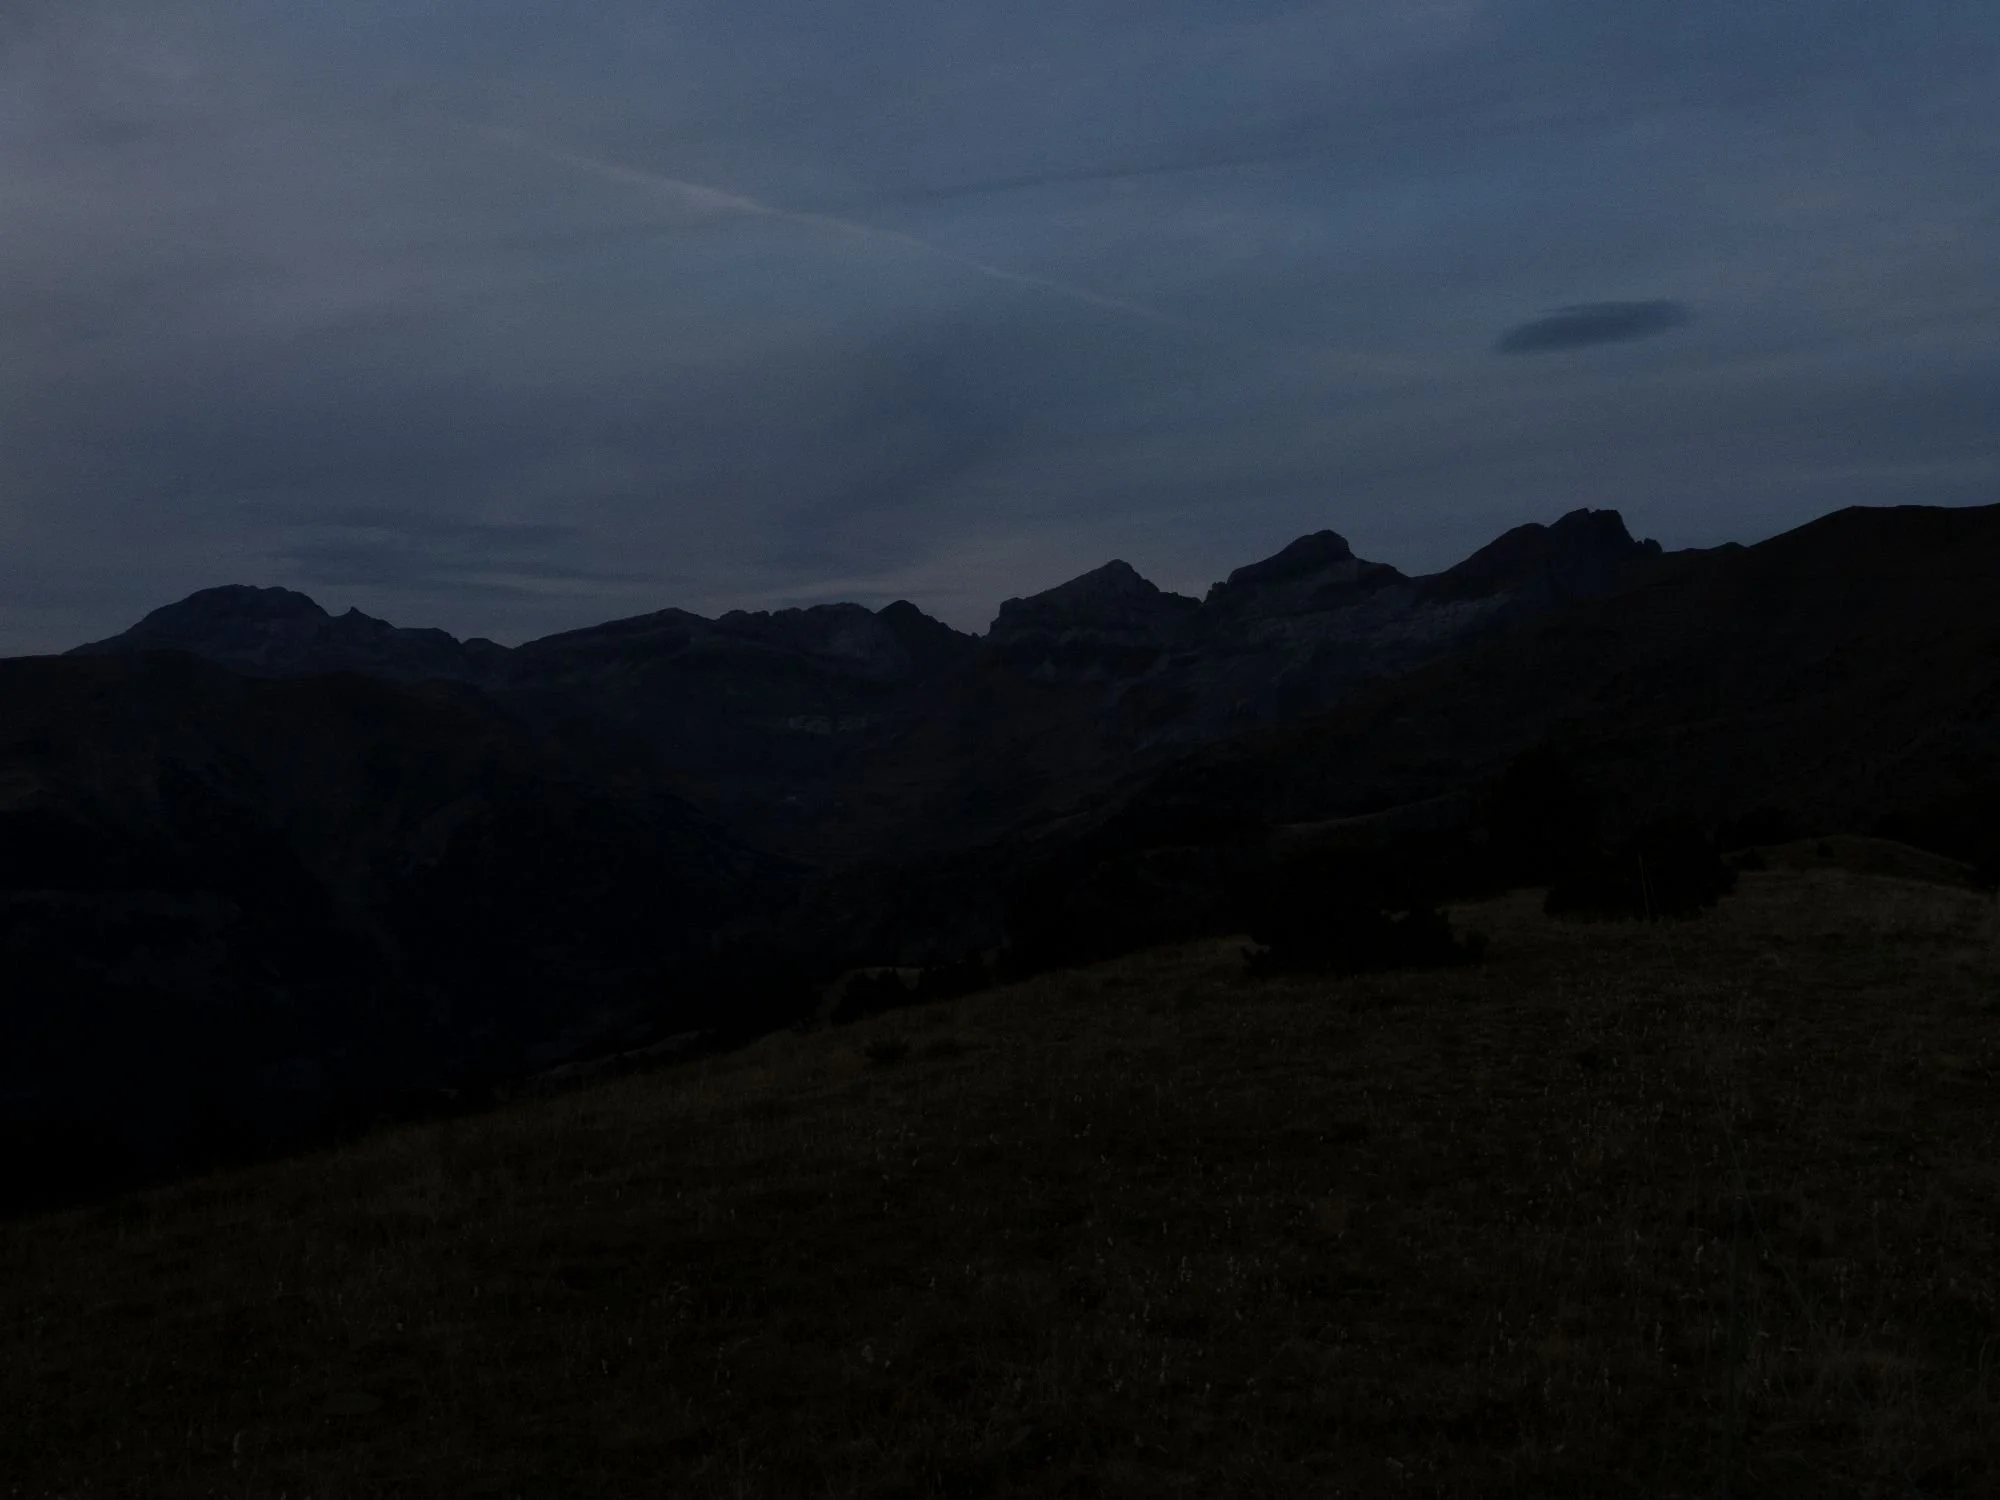
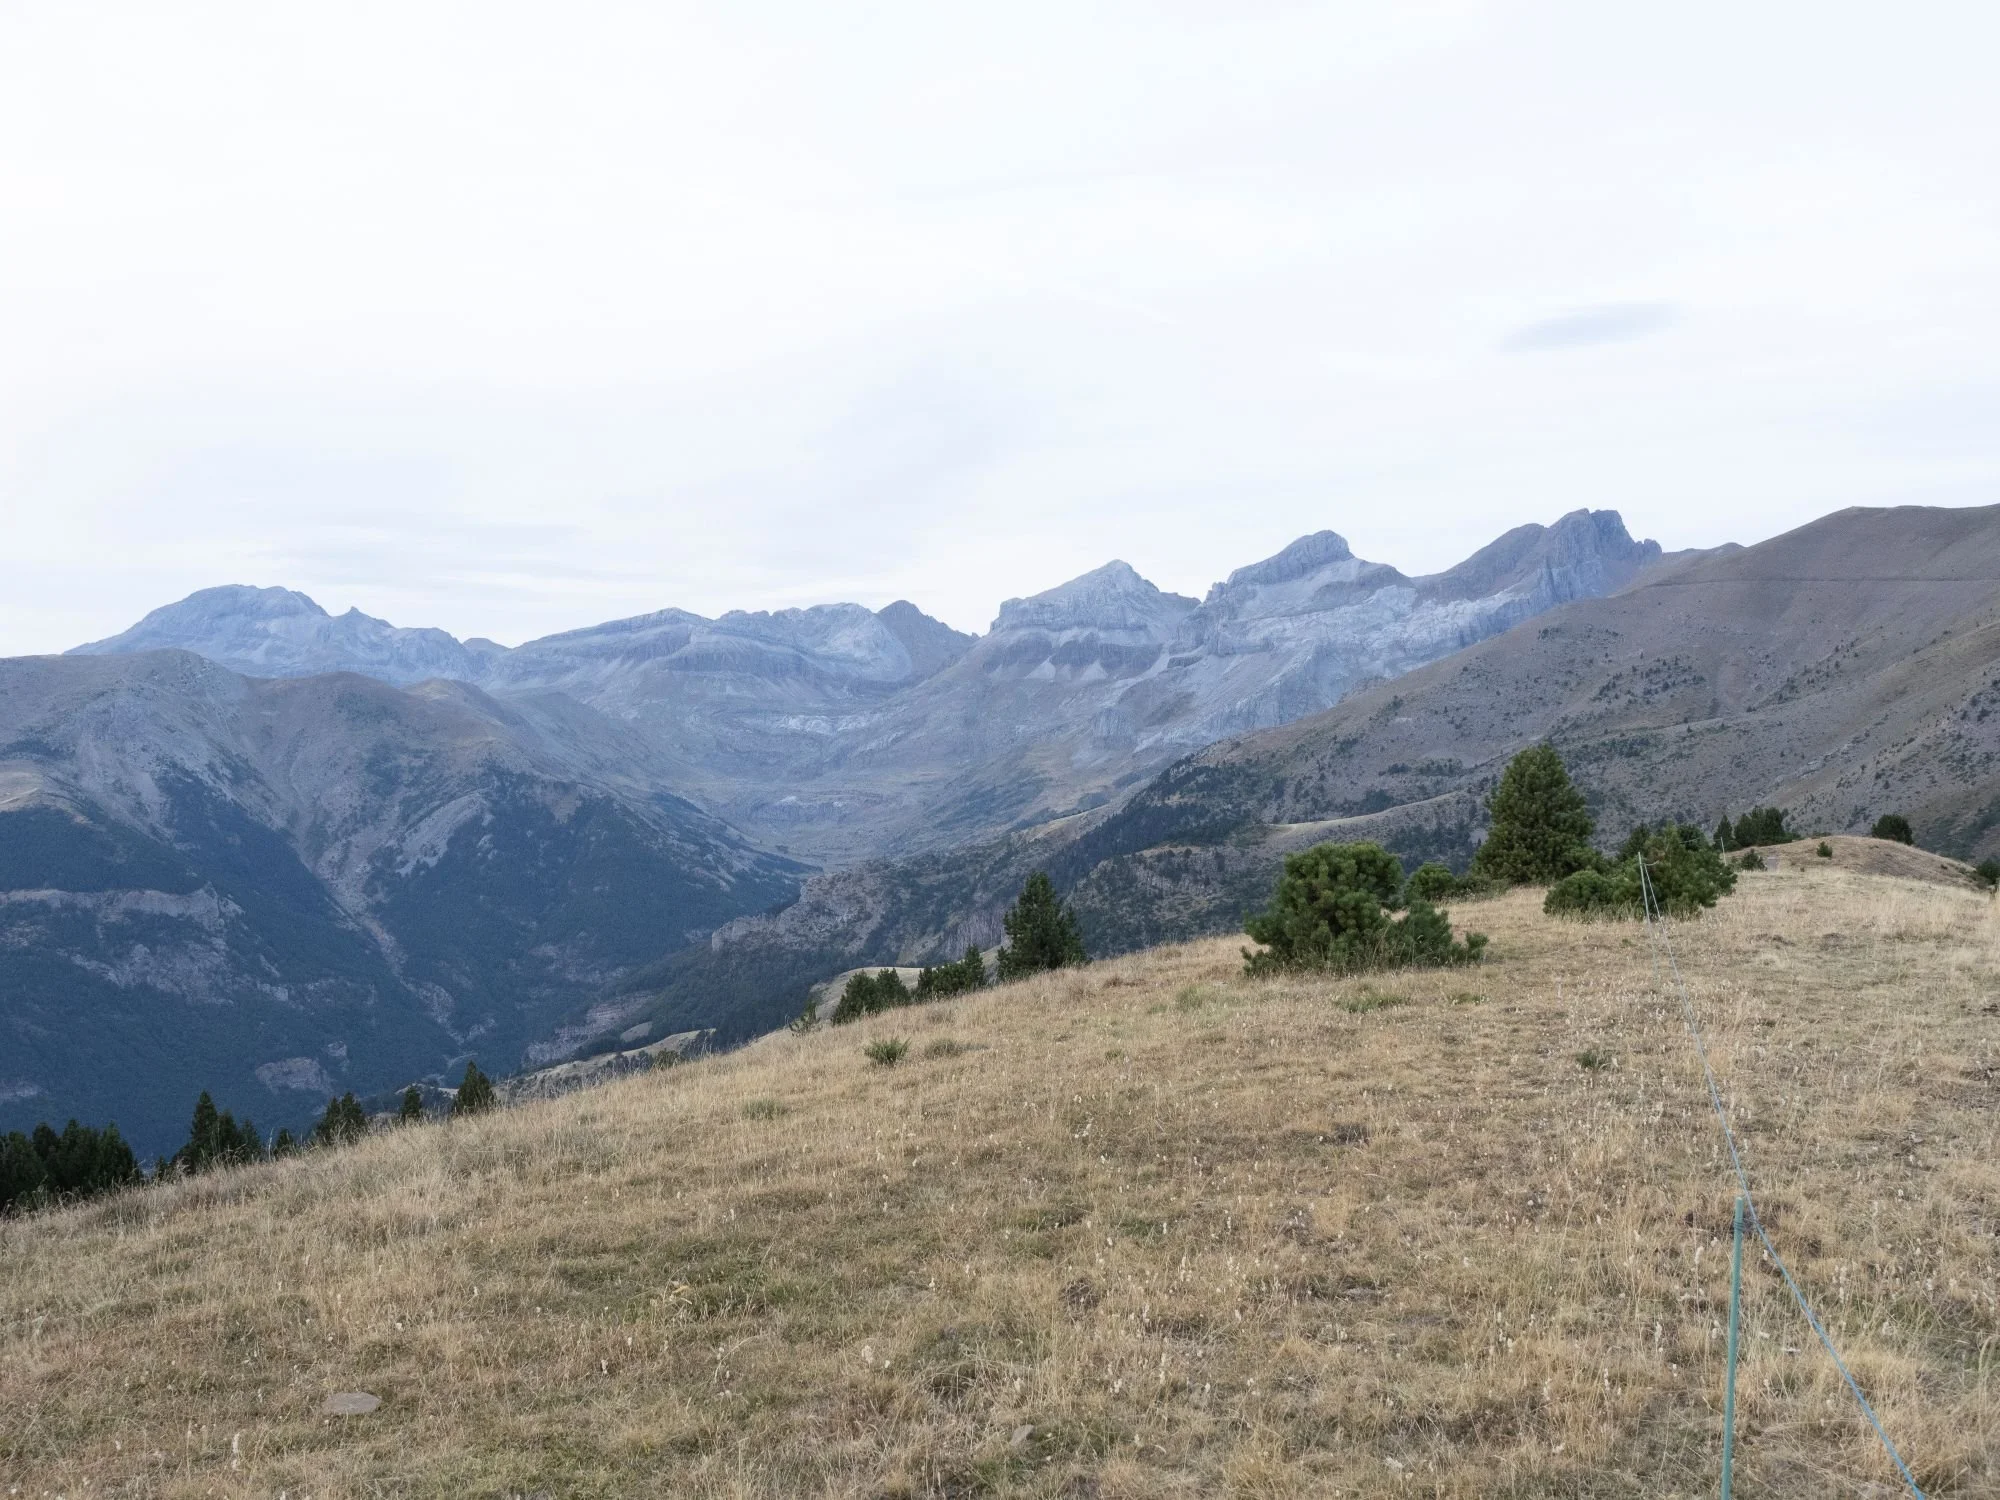
Here we have two versions of the same landscape, on the left with ETTL and on the right with ETTR, with their respective histograms below:

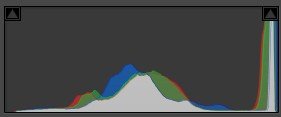
Obviously, both images are misexposed and need to be corrected in post-production. For this example I limited myself to applying the Adobe Color Adaptive profile, which performs AI-based tonal and color mapping. Here’s the result:
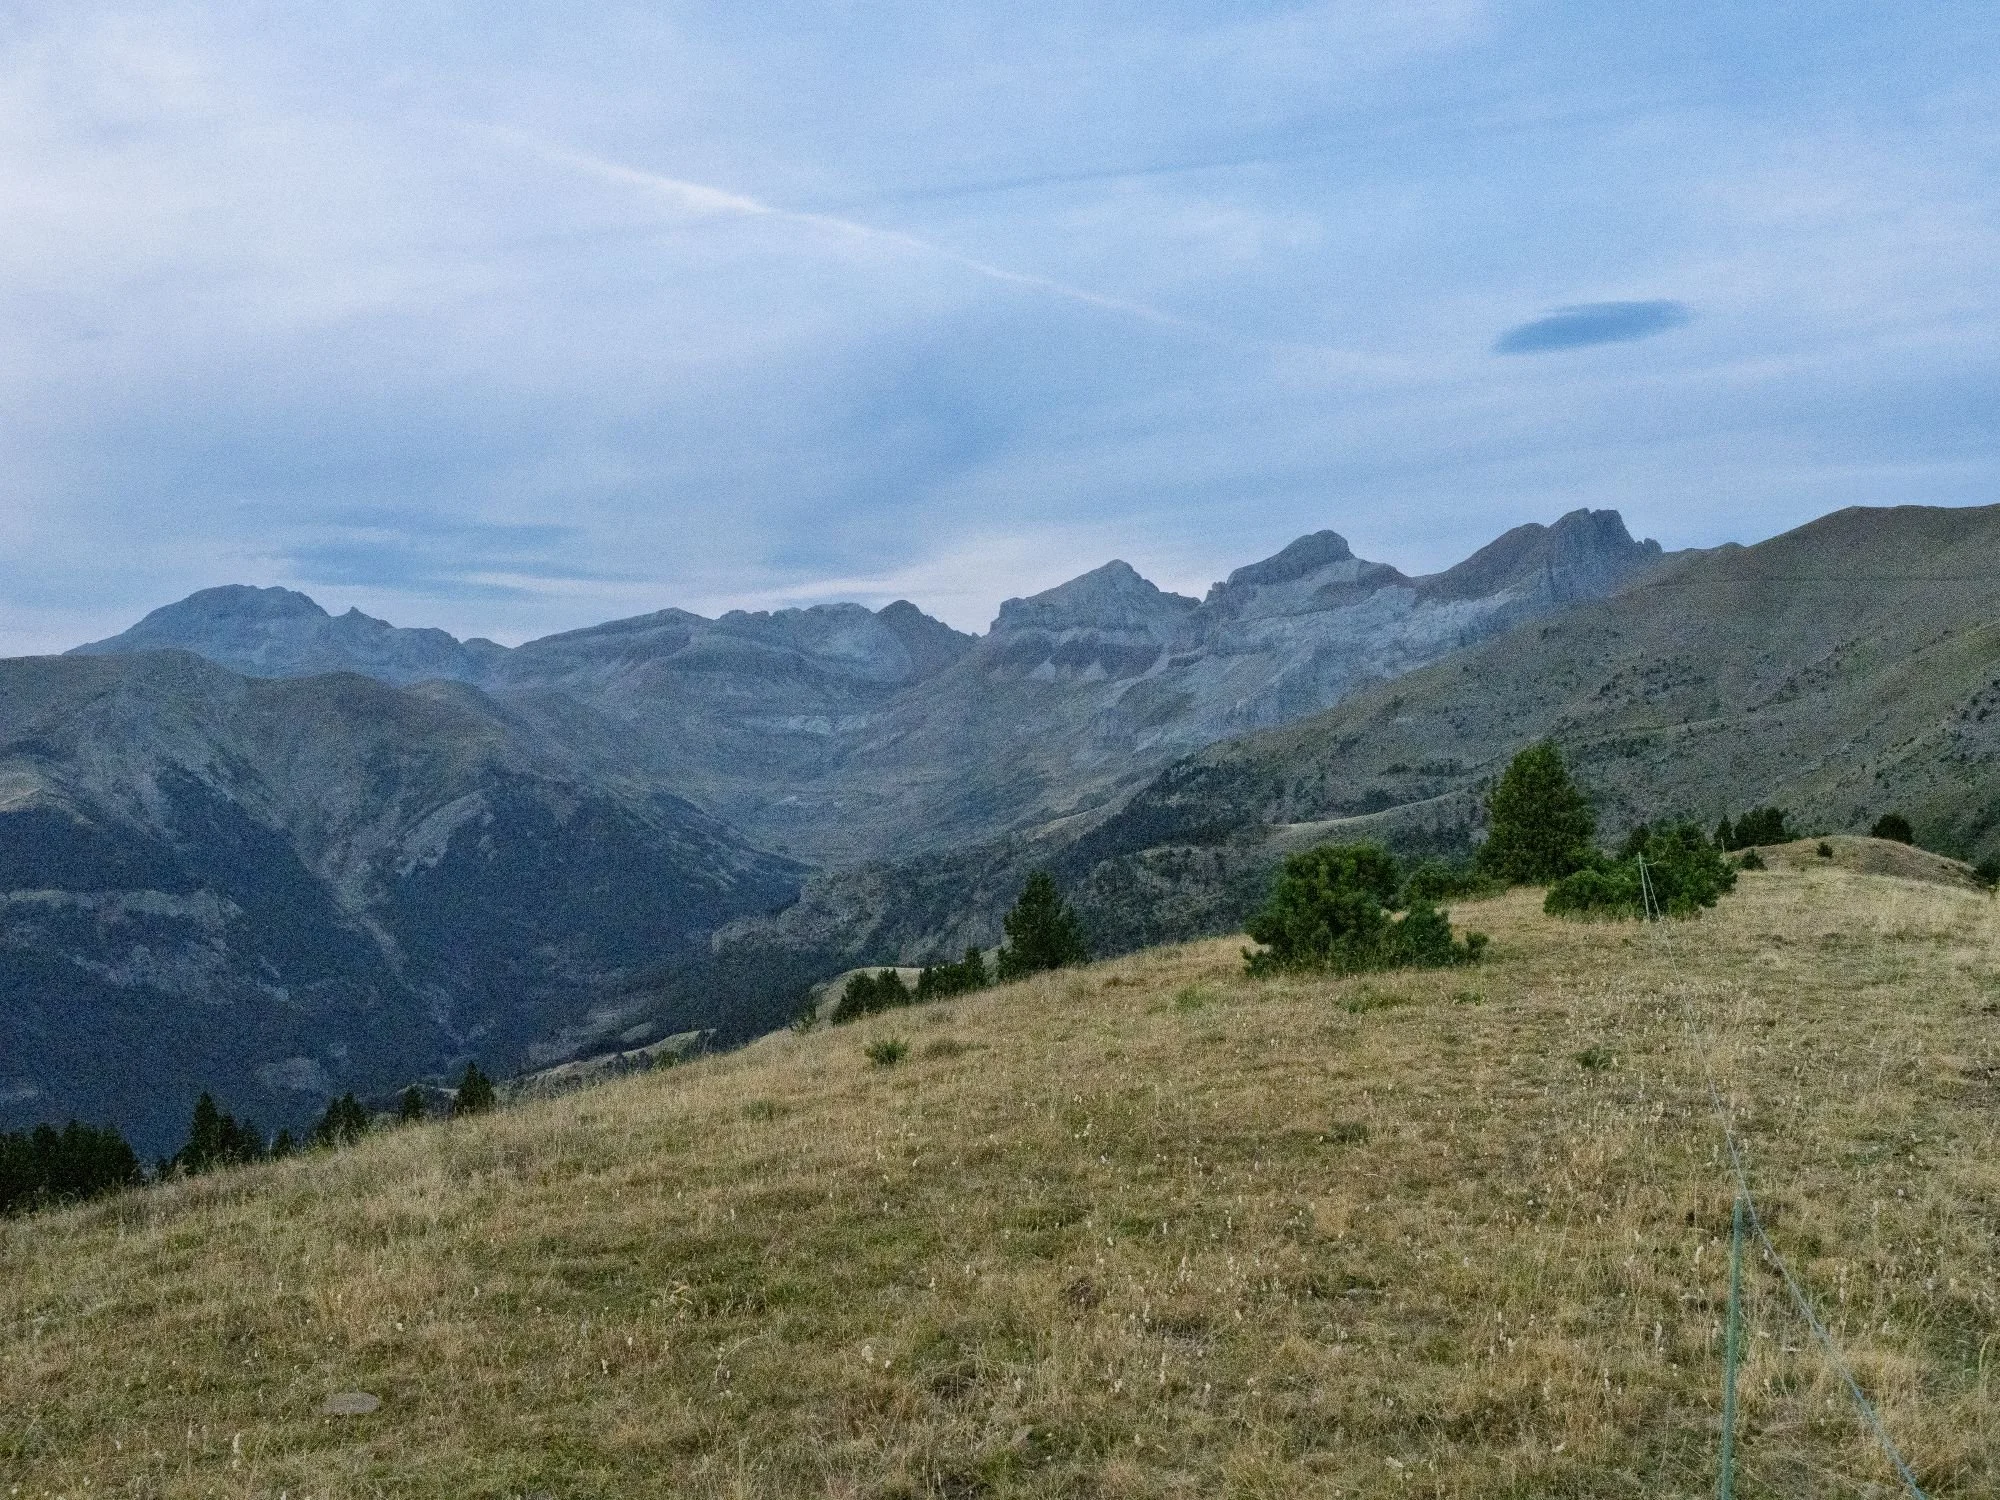
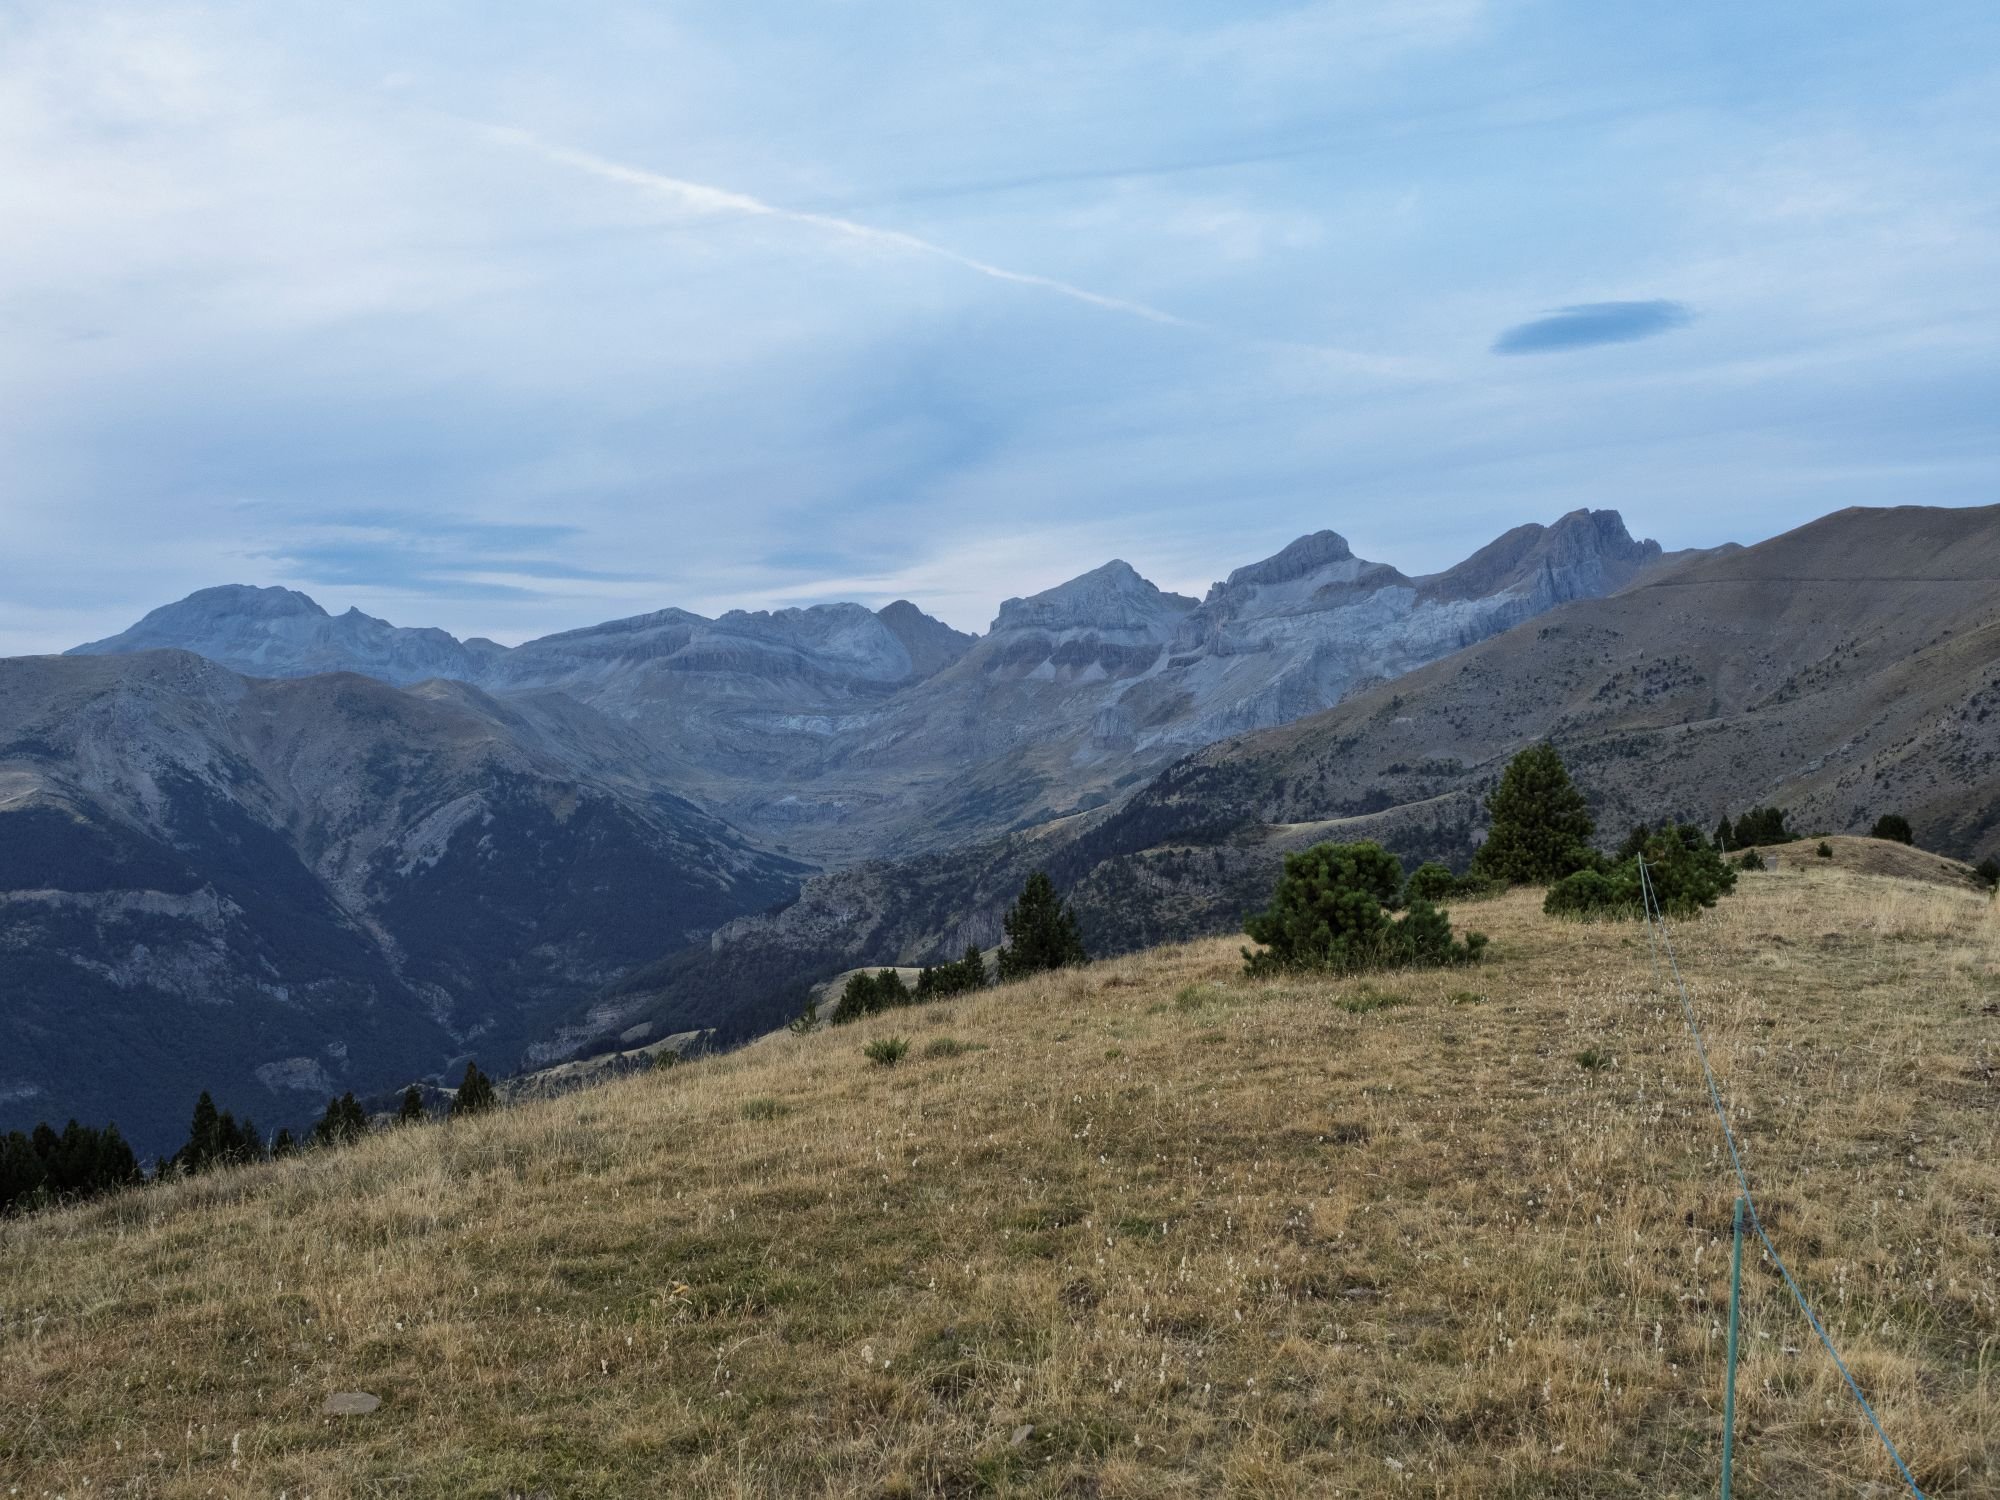
At first glance they look very similar, but it’s enough to enlarge the image a bit—say, on that lenticular cloud on the right—to see the difference:


Indeed, underexposure produces a much higher level of noise. Sure, software can remove it, and yes, high-end cameras will generate less—but my question is: why “make noise” in the first place if it can be avoided? Doesn’t it seem more correct to push the histogram to the right without blowing the highlights?
Conclusion
As so often in photography, the correct answer is: it depends. Landscape isn’t portrait. A low-contrast scene isn’t a high-contrast one. And of course it also depends on the expressive and aesthetic effect the photographer is after. The truth is that ETTL is “easy”, in the sense that you don’t have to measure light carefully, whereas ETTR requires more finesse but—despite the risk of blown highlights—greatly reduces noise. Therefore, the sensible approach is to first study the light in the scene, think it through, and then decide whether it’s more appropriate to underexpose, overexpose, or expose correctly—which, mind you, is also an option!
If you want to read more on the subject, there’s lots of information online. A good article is this one by Nasim Mansurov.
Notes:
The opening illustration was generated with Sora AI.
This article contains no affiliate links.
All photographs, tables, and diagrams in this article are original and of my own creation.
I want to thank all photographers I have been bugging for a week asking them about their ways to measure exposure. Thanks, guys, for all your input.